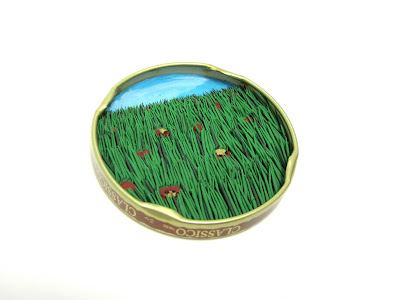
I've always been fascinated with shadowboxes. I really have no idea why, I guess the dept of an item is interesting? I really enjoy 3D movies, maybe that has something to do with it. Anyways, here's a shadowbox you can make with polymer. Use it as a wall hanging art, pendant, magnet, brooch or just as a nice piece of art.
What you need:
- Any size clean jar lid. (I put mine through the dishwasher.) (The smaller the lid the more work it is to create your art)
- Polymer clay
- Bake and Bond Polymer clay glue. (Sculpey is my choice)


 |
| Your clean jar lid, dry and ready to be made into art. |
 |
| Roll out your base color of whatever design you decide you'll be making. Place your lid on top of it and cut around the lid. (Doesn't have to be perfect) |
 |
| Since polymer clay doesn't stick to metal on it's own, using this bake and bond Sculpey glue will keep your art in it's proper place. Put a thin layer on your lid. |
 |
| Lightly place the clay sheet on top of the lid. Using careful pressure begin pushing the middle of the clay down softly and continue to push from the middle to the edges. (Don't push too hard or you'll lose the shape you created) |
 |
| What I like to do next is create the main focus piece. In this case it was a wolf. (This is not necessary, if you want to wait till the end it doesn't matter, I make it first to judge the size that I'll need to make everything else.) |
 |
| Make a foundation pop out. In this case it's grass so I rolled out the clay and cut around the lid again. Then I began to roll pieces of grass. |
 |
| To do this I just rolled a long piece of polymer and kept cutting it with a toothpick and placing it on the clay in the appropriate places. (this was tedious) |
 |
| When I felt there was enough grass I placed my wolf. This way I was able to place grass around it's feet as well to make it look like it was standing in the grass. |
 |
| Finished piece. The background is supposed to be the moon, and clouds with a bird/bat flying. And the wolf is howling at the moon. |
 |
| I wasn't happy with my creation of the wolf... (it's hard to do animals for me.) I decided to make this a magnet. I hot glued magnets onto the back of my art. |
 |
| Finished piece as a magnet on my fridge. |
Here's some more I've made: