" Frozen Fairytale: Recycled and Eco Friendly
Showing posts with label Recycled and Eco Friendly. Show all posts

Tuesday, April 16, 2013

Tutorial DIY Eco Friendly Recycled Wind Chimes


I've been collecting #6 plastic items ever since I found out you can shrink them to make them into jewelry. Here's the post on the jewelry I made: A bit of recycled fun
When creating the jewelry items I couldn't help but notice the beautiful noise they made when they clanged together. It sounded like small hail pellets hitting a tin roof ; not annoying like a small bell or gaudy like a cow bell. 
So I began making many tiny #6 shrink plastic items. And just tossing them around in my hands to hear the sounds. I could close my eyes and picture a dark cold day in the middle of nowhere. Hail falling gently from the sky and onto the tin roof. Sitting outside cuddled up in a blanket smelling the crisp cool spring air. The hail bouncing off the asphalt. It was truly therapeutic. 
I had collected two black #6 plastic pie containers from lemon meringue pies I had brought to a party. I find the look of silhouettes to be soothing as well. So I decided to create a wind chime to hear the beautiful noise and use the black #6 pie containers as silhouettes. 
I have been watching "The Following" ever since it first started, and honestly cannot get enough of it. I'm nervous of where it's going but hope that it remains as good as it is. Anyways, in "The Following" Edgar Allen Poe's writings are referenced many times. So I thought what better than to create a wind chime of my favorite Edgar Allen Poe poem; 'The Raven'


Here's a tutorial on how to create your own. 

What you'll need:

* An Idea
* Clean #6 Plastic container (Any color)
* Shapes, colors, cut outs, or drawings
* Sharpie permanent markers (optional)
* Fishing Line or Invisible thread
* Baking pan
* Oven 
* Parchment paper or Paper (optional)

Step 1:

Clean your #6 Plastic with soap and water, dry. 

Step 2: 

Draw or trace your images or ideas onto your plastic. For those using clear plastic feel free to color it in with sharpie (as seen in my post A bit of recycled fun) This will cause your plastic to look like a sun catcher.

Step 3:

Cut out your shapes and place them on your pan.
These were my shapes, if you look carefully you can see the #6 sign in the leaf. (Don't worry when it melts it disappears.)
I used the pan I designated for polymer clay, and baked my shapes on parchment paper. It's not necessary but if you have left over oils on your pan they will bake into your plastic. Normal paper works just as well. 

Step 4:

Preheat your oven to 350 degrees and turn on your oven light. 

Step 5:

Once preheated place baking sheet in the oven, put on your oven mitts and watch your plastic shrink. It should take less than 2 minutes from start to finish. First they should shrivel and curl. When they are done they should be flat again. Do not move from your oven during this time. It happens very quickly and you'll need to be there to remove your pan once they are flat. 

Step 6: 

Let them cool. They should be cooled in only a few minutes. 
Warning: If your plastic is irregularly shaped or way too long it may curl and refuse to uncurl. As you can see. I lost 2 of my branches because they curled and melted together. Sometimes this happens. If it does, it may just be the shape, so try a different shape. 
Step 7: 

Assemble your pieces. Try to hang them so that they will hit each other when the wind blows. 

Step 8: 

Hang your wind chime and relax to the soothing sounds. 


Update:
Made a new one, in color this time. :) Happy summer. 


Sunday, March 17, 2013

Bunny in my backyard

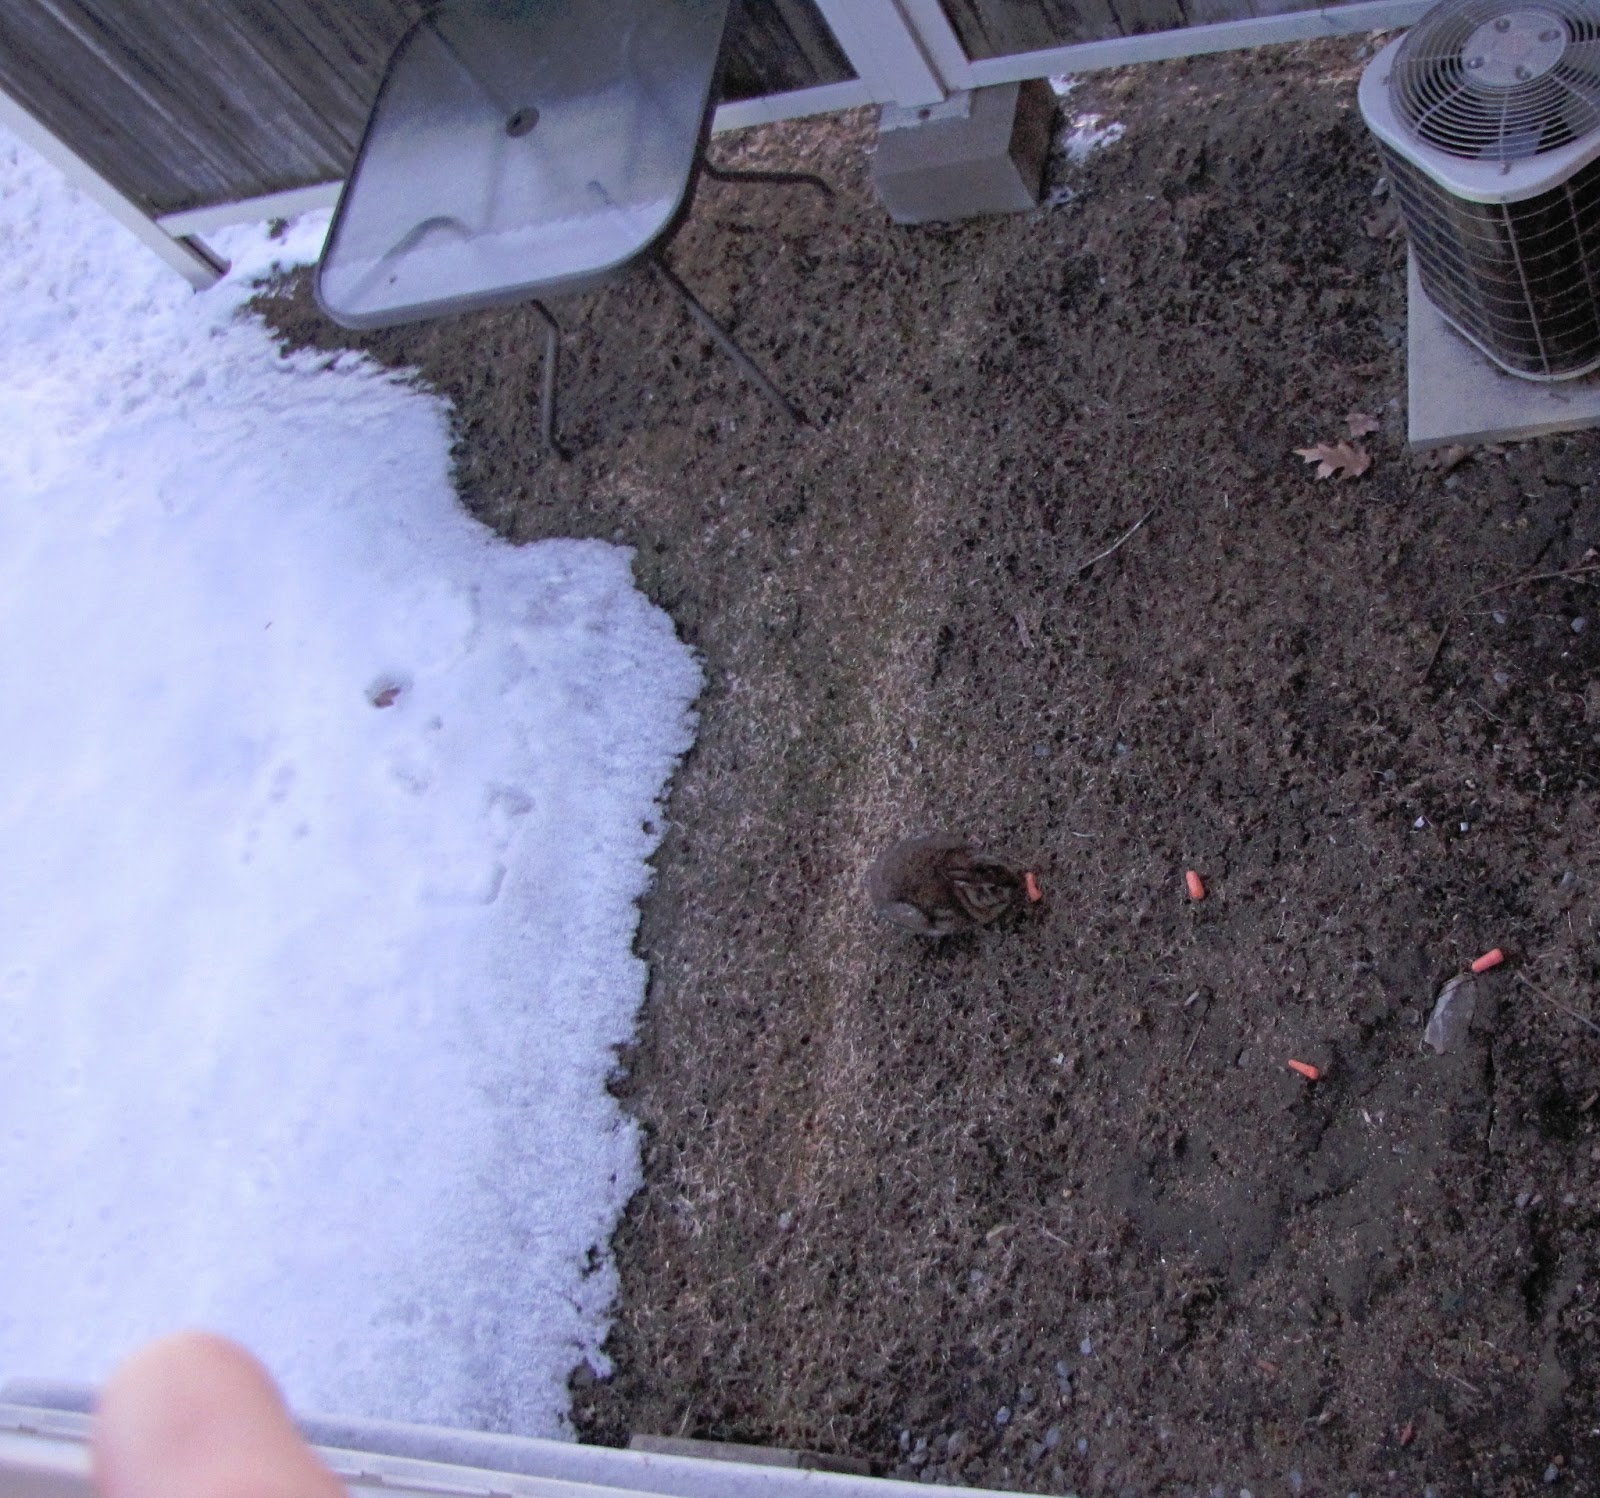
This afternoon my wild bunny friend came to pay me a visit. 


It was only this past year that I have moved here, and the animal life here was vastly different. I was previously living in a more busier part of town on the top twelfth floor apartment building next to the airport. The only animals that would ever pay me any notice up there were pigeons that would always fly away even if you were bringing them food. 
A favorite past time of mine is sitting by a lake or in a park and feeding ducks, squirrels, chipmunks, and even seagulls. I haven't been duck feeding at my favorite park in about a year. I used to take my expired bread products and stale crackers to feed the animals. 
When I decided to move after the wedding, we tried to find a slightly bigger place. The only thing nice and in our price range at the time was 20 minutes away. This part of town is still in development, but I'm really liking how much quieter it is. I haven't seen a single pigeon. I do however have a bird feeder, and get to see chickadees and other birds that I don't know the correct names of. 
Bird in the Backyard, summer 2012. Collecting nesting items for the nest beside our place.


Birds aren't the only difference. We now have bunnies. I tried planting a garden, but I think I planted it too late in the summer for anything to actually grow. It was either that or I just don't have the green thumb. However the bunnies never seemed to steal any of the tomatoes or strawberries. 
Early in winter I was making a lot of chicken pot pies, (My husbands favorite) and I ended up having a lot of carrots left over. Now this may gross out some people, but I still have them in my fridge. I save the bag for the bunnies. It's weird, I would've thought the carrots would be mushy by now, but they are still very hard, just a little dried out. Whenever I see the bunnies pass by, I run into my kitchen grab the carrots and throw them a couple. Bunnies are just so cute to watch nibbling on food, the sounds they make are adorable. 


Bunny in the yard, flash camera, march 2012

Bunny eating a carrot, flash camera, march 2012


The view from my backyard.

The land in my backyard and just a bit out is undeveloped. That's where they live, make their homes and have their babies. Sadly, in the next year to 3 years the city will be tearing down the landscape, and ripping up the trees to make more stores and buildings. I just hope I won't lose my wild bunnies. 

Saturday, March 16, 2013

Jar Lid Shadowboxes

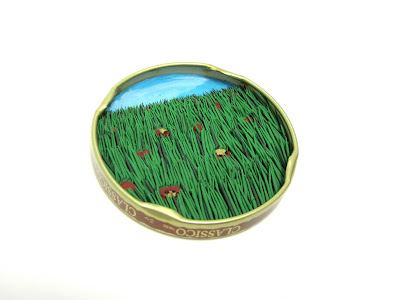
If you are anything like me you keep every jar that you go through. I must have at least 45-75 jars and lids in a huge cupboard. It's hard to find things to do with them, art wise that would actually be useful to me or that I would enjoy making. All the mason jar crafts I've seen just don't attract my attention. However, I thought of a great craft to do with the jar lids that were accumulating. 

I've always been fascinated with shadowboxes. I really have no idea why, I guess the dept of an item is interesting? I really enjoy 3D movies, maybe that has something to do with it. Anyways, here's a shadowbox you can make with polymer. Use it as a wall hanging art, pendant, magnet, brooch or just as a nice piece of art. 

What you need:

  • Any size clean jar lid. (I put mine through the dishwasher.) (The smaller the lid the more work it is to create your art)
  • Polymer clay
  • Bake and Bond Polymer clay glue. (Sculpey is my choice)


Your clean jar lid, dry and ready to be made into art.

Roll out your base color of whatever design you decide you'll be making. Place your lid on top of it and cut around the lid. (Doesn't have to be perfect)

Since polymer clay doesn't stick to metal on it's own, using this bake and bond Sculpey glue will keep your art in it's proper place. Put a thin layer on your lid. 

Lightly place the clay sheet on top of the lid. Using careful pressure begin pushing the middle of the clay down softly and continue to push from the middle to the edges. (Don't push too hard or you'll lose the shape you created)

What I like to do next is create the main focus piece. In this case it was a wolf. (This is not necessary, if you want to wait till the end it doesn't matter, I make it first to judge the size that I'll need to make everything else.)

Make a foundation pop out. In this case it's grass so I rolled out the clay and cut around the lid again. Then I began to roll pieces of grass. 

To do this I just rolled a long piece of polymer and kept cutting it with a toothpick and placing it on the clay in the appropriate places. (this was tedious)

When I felt there was enough grass I placed my wolf. This way I was able to place grass around it's feet as well to make it look like it was standing in the grass. 

Finished piece. The background is supposed to be the moon, and clouds with a bird/bat flying. And the wolf is howling at the moon. 

I wasn't happy with my creation of the wolf... (it's hard to do animals for me.) I decided to make this a magnet. I hot glued magnets onto the back of my art.  

Finished piece as a magnet on my fridge. 

Here's some more I've made:


Friday, March 8, 2013

Recycled plastic shampoo bottle jewelry tutorial

I recently finished another bottle of shampoo. As I was about to throw it in the garbage I realized how beautiful the sheen and colors were on the bottle and thought... "hmmm I must be able to do something with that!" So of course I made some jewelry. :)

This is a very simple and easy craft for adults or youngsters. 

What you need:


  • Pretty looking shampoo bottle (used and empty... it's not eco friendly to waste)
  • Scissors
  • Patterns of your choice
  • Exacto knife (if the top and bottom of the bottle are hard)


This was my shampoo bottle. 

Step 1: Rinse the bottle as well as you can.

Step 2: If the tops and bottoms are harder plastic than the middle area like mine was you will need to cut them off with an exacto knife. Cut just above and below the bottom and top rims to save as much plastic as possible. 

Step 3: Cut a slit all the way down the bottle until you can open it up like a book. 

Step 4: Rinse the bottle again. My bottle had left over suds. Dry it.

Step 5: Shape cutting. I didn't want to ruin any side of the plastic I had so instead of tracing on the bottle I just cut around a paper shape I had made. 

Then assemble your masterpieces!

Here's what I made:


Thursday, March 7, 2013

Pop can jewelry

I recently came into possession of some pretty looking pop cans and couldn't let them go to waste. Pop cans can be recycled into many cool crafts not just jewelry. So go ahead and start recycling :)

This is a great craft to do with your tweens and teens, but it can be dangerous. Using rubber dish gloves, workers gloves or even gardening gloves would be safer. 

I collected some colorful cans, cut them and washed them well with soap and water. 


Draw a pattern on your aluminum with a marker. To reduce waste, try filling up as much space as possible. I chose to draw 3 sizes of flowers. If you'd like, cut out a cardboard or paper piece of the image you'd like to have on the can and trace it. 


Now cut out your shapes. Sharp scissors work best, the smoother the cut the less fraying and rough edges you'll have in the end. 


Carefully feel the edges, if you've cut well enough sanding won't be necessary. If there are rough edges simply sand them down. I like to use a nail file. 

I pierced the centers of each of the flowers and one in the top of a petal in the largest flower. Piercing the metal can be done with a sewing needle or push pin. I placed the flowers onto a cardboard box so that I would not pierce the table. Now you can shape your flowers, I rolled up the edges using a pin. 

I assembled my flowers into earrings.

Buy


If you are lucky enough to possess a Sizzix machine this can be easily accomplished without a lot of effort, and with many different shapes.

Saturday, March 2, 2013

Melted Beads

We've seen it all over the internet on many different blogs, for many different purposes. So, I decided why not try it out for myself. Almost every crafter has pony beads or acrylic beads, and unless you want to make jewelry for youngsters there's really not much use for them. Melting them allows for much more possibilities with shape, look and overall use. 
I warn you now, this project is dangerous. I personally would not endorse doing this project with a child anywhere near by. The toxins from melting acrylic beads are toxic. Many people resort to doing this project outdoors in a BBQ or a toaster oven. Personally I would suggest if you ever want to use your toaster oven, oven, or BBQ again you would need to wash it well afterwards then let the heat run for a few minutes at high heat. A lot of people use their old toaster ovens exclusively for the melting of plastics. If you do decide to do this indoors, please keep your windows open, oven fan on and ensure you do not breathe in these chemicals. 

What you need:

*Acrylic Beads (Pony beads are great for this)
*Oven or Toaster oven or BBQ
*Tinfoil
*Mold (I used an old muffin tin) (I would not suggest using this item for food afterwards.)
*Drill (optional)


Step 1:

If your beads are old or reused, Soak in warm water and soap to clean them before beginning the process. (We don't want unnecessary oils)
Preheat the oven

Step 2:

Begin to organize them into your tray.

Placing them and not overlapping in the tray will allow for a flat piece of art. The more beads you put in the tray the longer it will take to melt them. 

Step 3:

Cover molds with tinfoil. 
I used the tinfoil to prevent most toxins from sticking to the walls of my oven. 

I heated mine for 30 minutes, but it really depends on the shapes, sizes and looks that you want. 

Be cautious, when taking off the tinfoil a large cloud (That I could actually see) came out and the smell was unbelievable. Moving into the other room, opening the windows, ventilator fan, Febreze... none of it worked for me. A lot of the toxins stayed inside the tinfoil and made the tinfoil stink as well. Even placing the tinfoil in the garbage was not enough. 
Let the molds cool. 

Step 4:

Pop your new larger beads out of the molds. (Mine popped out very easily)


Step 5:

Drill a hole in them. You can choose to wire wrap them if you do not have a drill. Or perhaps you can make smaller melted molds and create stud earrings. Or glue it to a surface. 


For this project just use your imagination. Muffin tins are only step one, if you have shaped tins you can create many different shapes and sizes. Also if you have more time, you can create thicker creations. 

These can be made into many neat objects, some of which are jewelry or sun catchers. 

Here's what I made:


Friday, March 1, 2013

A bit of recycled fun

While browsing Pinterest one day I came across a recycling craft idea that uses plastic containers and turns them into awesome crafts! Every time I would buy croissants, pies, butter tarts etc. I would have a hard time throwing out the plastic. It's big, it's bulky and it doesn't crush well. On October 29th 2012 they issued that garbage will be collected biweekly instead of weekly. They also have weight restrictions, height restrictions and number of garbage's per household allotted. The only recycling box we have in our neighborhood is for paper products, not plastics. So the idea of eliminating most of that bulky plastic in the garbage AND being able to craft with it was heavenly. Here's a few works I have completed.


Related Posts Plugin for WordPress, Blogger...